Thursday, June 30, 2011

Blogger jQuery Tabbed Sidebar Widget Tutorial

How to install a jQuery tabbed sidebar widget on your Blogger blog.

Recently, over on my main blog Bonjour Tristesse, I installed a tabbed widget to more efficiently use the space on my sidebar.  Here in this post, I will explain how to accomplish this on your own templates.

First of all, you need to have jQuery installed on your template.  jQuery is a powerful JavaScript library that allows you to do many cool things with simple coding and it is very easy to install onto your blog.  We just have to simply include the scripts on our template.  These scripts are conveniently hosted for us by Google.

Tuesday, June 28, 2011

Set up your Blogger profile

One simple thing that I noticed a lot of new bloggers neglecting to do is they don't have a link to their blog on their Blogger profile.

You may not realize, but by default your Blogger profile is empty.  So for instance if you follow another blog, nobody can follow you back because they won't find a link to your own blog in your profile.

Also, if you do not have an avatar, you will be added to the end of the followers list instead of at the front.  So someone with a lot of followers might not notice you there and won't be able to follow you back.

Thirdly, a good way to find similar blogs to yours or other blogs you might be interested in is to fill out the interests section with your relevant interests.  These will become clickable links to other bloggers with the same interests that you can browse through to find blogs you might like.  More importantly, it adds you to these same lists so other bloggers can browse and find you.


So make sure you go to your Blogger dashboard > Edit Profile and: 
  1. Add your blog to the Show My Blogs section. 
  2. Add an avatar to the Photograph section.
  3. Fill out the Extended Info > Interests section.

Monday, June 27, 2011

Remove borders and box shadow from images

How to remove the borders and box shadows from images on your Blogger blog.

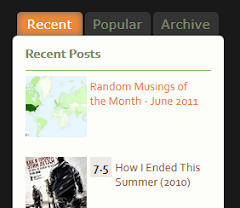
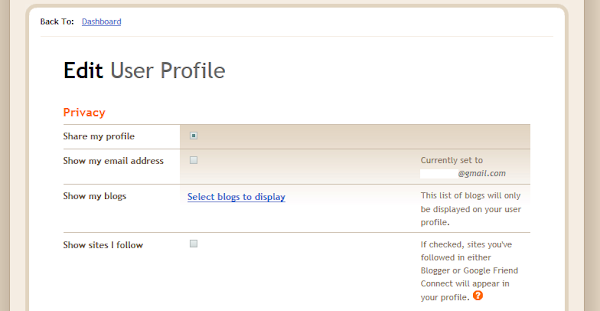
Most of the default Blogger templates display a white border and box shadow frame around every posted image like the example below:


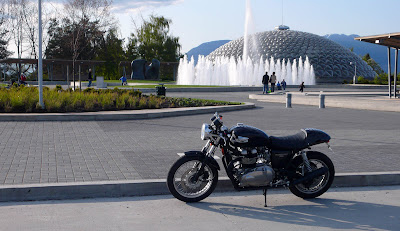
But some bloggers prefer to have their images displayed without the border and shadow like so:

There are two ways to accomplish this depending on whether you want to completely remove the effects for every image or just on specific images.

Method 1:
If you want to remove the borders from all of the images on your blog, add the following code to your CSS.  Design > Template Designer > Advanced > Add CSS:
.post-body img, .post-body .tr-caption-container, .Profile img, 
.Image img, .BlogList .item-thumbnail img {
    border: 0px;
    -moz-box-shadow: 0px 0px 0px rgba(0, 0, 0, .0);
    -webkit-box-shadow: 0px 0px 0px rgba(0, 0, 0, .0);
    box-shadow: 0px 0px 0px rgba(0, 0, 0, .0);
    border-radius: 0px 0px 0px 0px;
    background: none;
}
Method 2:
If you want to selectively remove the borders from specific images, add this code to your CSS.
Design > Template Designer > Advanced > Add CSS:
img.noborder {
    border: 0px;
    -moz-box-shadow: 0px 0px 0px rgba(0, 0, 0, .0);
    -webkit-box-shadow: 0px 0px 0px rgba(0, 0, 0, .0);
    box-shadow: 0px 0px 0px rgba(0, 0, 0, .0);
    border-radius: 0px 0px 0px 0px;
    background: none;
}
Then in your post editor HTML tab, edit the img tag(s) for each of the images you want to remove the borders from by assigning them to the "noborder" class like this:
<img class="noborder" src="http://YOURIMAGEURL">

Sunday, June 26, 2011

Swap blog title after page title

How to swap blog title after page title.

If you look at your browser's title bar you will notice that Blogger's default templates display your blog title in front of each page or post title.

For example this page title would normally be displayed as:

Stupid Blog Tricks: Swap blog title after page title


This is not great for search engine optimization and makes it difficult for people to search for your posts. The reason being is that users are more likely to search for specific post content rather than the actual name of your blog. So having the post titles first increases your chances of being found.

To have your blog title displayed after the page title like so:

Swap blog title after page title | Stupid Blog Tricks


Look for this line in your template:
<title><data:blog.pageTitle/></title>
and replace it with this:
<b:if cond='data:blog.pageType == &quot;index&quot;'>
    <title><data:blog.title/></title>
<b:else/>
    <title><data:blog.pageName/> | <data:blog.title/></title>
</b:if>
Line 2 tells it to display your blog title by itself on your home page, and Line 4 tells it to display the post title followed by your blog title separated by a '|' on every other page.

Feel free to change the '|' to any character(s) you like or even add a brief description after your blog title.

Saturday, June 25, 2011

Center your header image.

How to center your header image.

By default, Blogger aligns your header image to the left. But some might want their images to be centered. There are a couple ways to accomplish this depending on how you've setup your header.

If your header is set to "Behind title and description"
    Add the following code to your CSS:
    #header-inner { 
        background-position: center !important; 
        width: auto !important; 
    }
    

    If your header is set to "Instead of title and description" or "Have a description placed after the image"

    Add the following code to your CSS:
    #header-inner img { 
        margin: 0 auto !important; 
    }
    

    Friday, June 24, 2011

    Welcome

    Hello and welcome to Stupid Blog Tricks.

    I created this blog mainly to document for myself the various Blogger tricks and tweaks that I have discovered since I started blogging last September.  Somewhere to keep all this information in one place.

    I will be posting some blogging observations, and how to's on stuff that I've integrated into my main blog everything from basic commonly asked tips to advanced custom widgets.  Hopefully some of what I've learned can help others make the most of their Blogger experience.

    Cheers!